|
|
|
The Wet Entry
4 Step "Balance Point Method"
by Robert and Briana Finlay of Kayak Lake
Mead |
The easy to learn 4 Step "Balance Point Method" of Wet Entry by
Robert and Briana Finlay of Kayak Lake Mead.
This is the quickest wet entry / rescue /self-rescue /
re-entry method to employ to literally get your butt back into your kayak.
You can be in the surf zone, find yourself capsized because of a wave and reenter
before the next wave hits you; I've done it.
Further, this is the easiest and quickest method to learn. Coaching can help,
but you should be able to acquire this wet entry
/ re-entry technique in a few attempts and have it mastered in a few
more. Everybody that I've taught this skill to acquires it rather quickly.
I developed this self-rescue method based upon the
climbing technique of getting up, onto, and standing on a
narrow ledge or "mantling". To read some of my climbing resume, click
here .
It requires no extra accessories such as a paddle float or
bungees behind the cockpit. You just get back in your kayak, here's how...
I teach this rescue technique the way I teach climbing
techniques; I want you to concentrate on your center of gravity,
located somewhere between your navel and your groin. Where your center of gravity
goes, you go. Where your center of gravity (CG) is, you are.
This wet entry method requires the alignment of your
(CG) and the kayak's (CG), which if your kayak is loaded correctly, is somewhere
right near where your butt sits in the boat.
While practicing the 4 Step "Balance Point Method"...
Concentrate on...
(1) Placing your CG right over the kayak's CG,
when you do this, your CG, the kayak's CG, and the center of the earth are
in alignment. Everything will be aligned, balanced, and just fine.
Concentrate on...
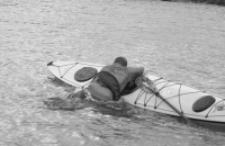
(2) STABILIZING yourself at each balance point. After you
execute a motion, relax, settle down, and let the kayak and yourself be balanced.
(fig. 4) .
Concentrate on...
(3) RELAXING at all times. I'll assume that being in kayaking
conditions that cause you to be dumped may be cause for apprehension. When
you are under stress, it does no good to be tense, this will only restrict
your actions.
Neither your body or mind can function well if you are tense.
Relax while you are in motion and relax while you are in a balance point.
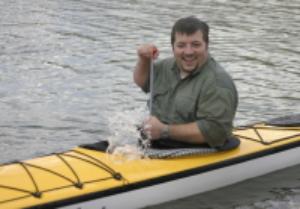
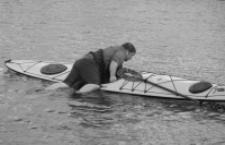
Before Wet Entry Step One, you have already righted the kayak (fig. 1) . If
it had too much water in it, say a waterline above the seat, you have already
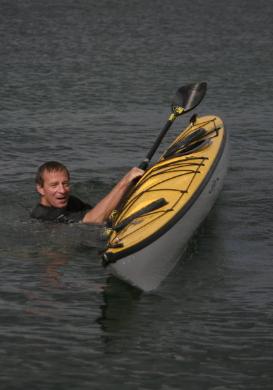
pumped or bailed out some water. Enough talking, let's do it. First, stick
your paddle in the bungees (fig. 2) or not (fig. 4) . I prefer to have my paddle
in my hand, this way I can immediately begin bracing again if conditions require
it.
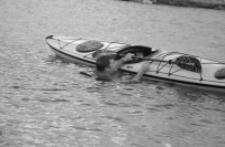
Wet Entry / Self-Rescue Step One:
Kick the water and jump up, onto, and over your kayak while at the
same time pull your cockpit under you. Keep pulling yourself across (fig. 3)
your kayak until you are centered and balanced, CG over CG (fig.
4). Relax and Stabilize over balance
point one : Remain laying across your kayak until you and kayak have
settled down. Relax and do not rush into the next step.
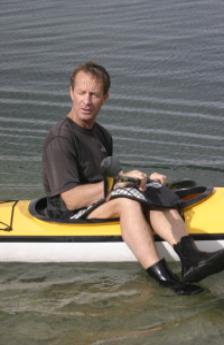
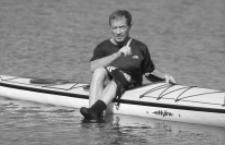
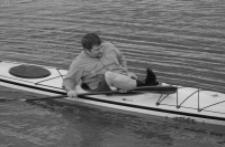
Wet Entry / Self-Rescue Step Two:
With the hand nearest the bow, (fig. 5) grab the near side of your
cockpit with palm reversed, slip the hip nearest the stern into your cockpit,
at the same time rotate and plop your butt into the seat, CG over CG (fig.
6) . Relax and Stabilize over balance
point two : Remain sitting "side saddle" until you and kayak have
settled down (fig. 7 & 8). Relax
and do not rush into the next step. You should be able to paddle "side saddle" (fig.
7) . In fact, practice paddling "side saddle" as an intermediate skill.
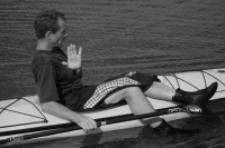
Wet Entry / Self-Rescue Step Three:
Lean back (fig. 9) keeping CG 's relatively aligned but lean back
allowing you enough room to bring one leg into your kayak. Lean forward re-aligning, CG over CG. Relax and Stabilize over balance
point three :
Remain sitting with one leg in and one leg out of your kayak until you and
the kayak have settled down. Do not rush into the next step. Be balanced first.
Wet Entry / Self-Rescue Step Four:
Lean back and bring the remaining leg (fig. 10) into your kayak. Do
not rush into this step. Once the leg is in, quickly acquire the fourth
balance point, which is you sitting in your kayak. Get your spray
skirt on and finish bailing or pumping out water. I like pumping with my spray
skirt on, no sense letting more water in from the conditions which caused you
to dump in the first place.
Wet Entry Rescue Review:
I cannot over emphasize that...
You must remain relaxed throughout.
Concentrate on "moving your CG" and not your body. In
other words, when you move your body it is with the purpose of moving your
CG to the next balance point. Concentrate on remaining aware of where your
CG is.
Even when moving what seems to be a non-CG component of your body, such as
your leg, remain cognizant of how to move that leg while keeping your CG aligned
with your kayak's CG and the earth's center (this is called balance).
You must allow you and your kayak to settle down after each motion, which is
of course, at each balance point.
Practice it a few times. This is the easiest quickest wet entry / rescue /self-rescue
/ re-entry method. It is simply based upon the balance points of you and your
kayak.
|


|